This page will guide you through the first steps of setting up your the Ultium Portable Lab system and recording your first measurements.
Unboxing your Portable Lab
Ultium Motion system
Ultium EMG system
Core EMG system
If your Portable Lab contains Core EMG sensors, visit our Core EMG Getting Started Guide🔗to learn more about how to configure the EMG sensors in the MR software, place electrodes, and collect data. The Ultium EMG sensors communicate wirelessly with an Ultium receiver built into the Portable Lab.
Configuring two Ultium receivers
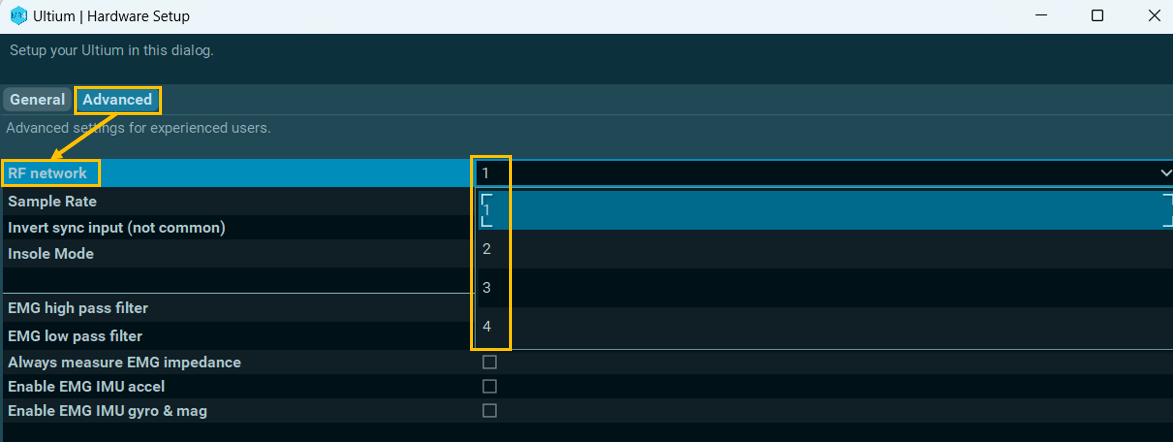
If your Ultium Portable Lab contains multiple systems (e.g. an IMU and EMG system), each system must be set to a different RF Network in the Ultium settings in the Hardware Setup to avoid communication issues.
The RF Network can be set to any number, but the networks on each Ultium receiver must differ from each other.

Adding Ninox cameras
If your Ultium Portable Lab came with Ninox reference cameras, learn more about setting up your Ninox camera and synchronizing it with the Portable Lab in our Ninox Quick Start Guide🔗.
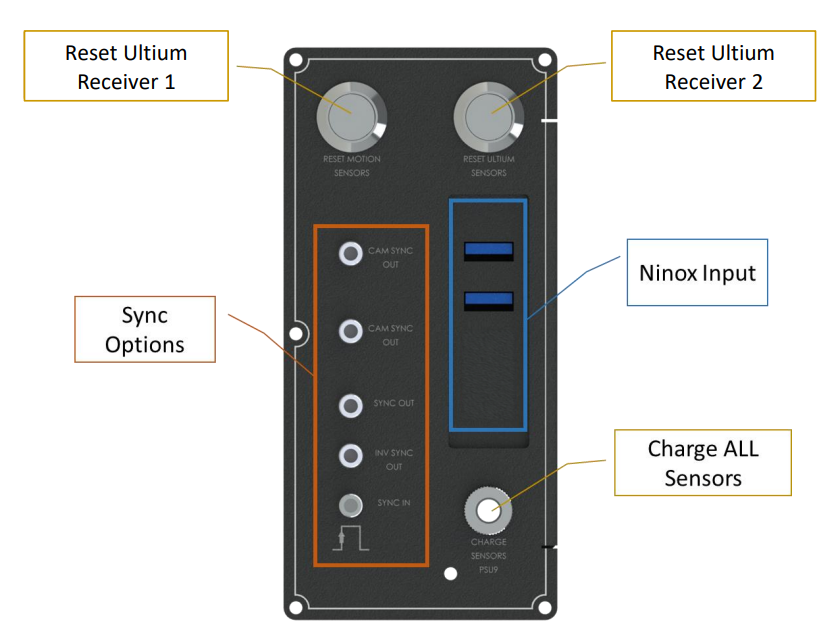
For optimal performance, plug your Ninox cameras into the Ninox Input on the Portable Lab, shown below.
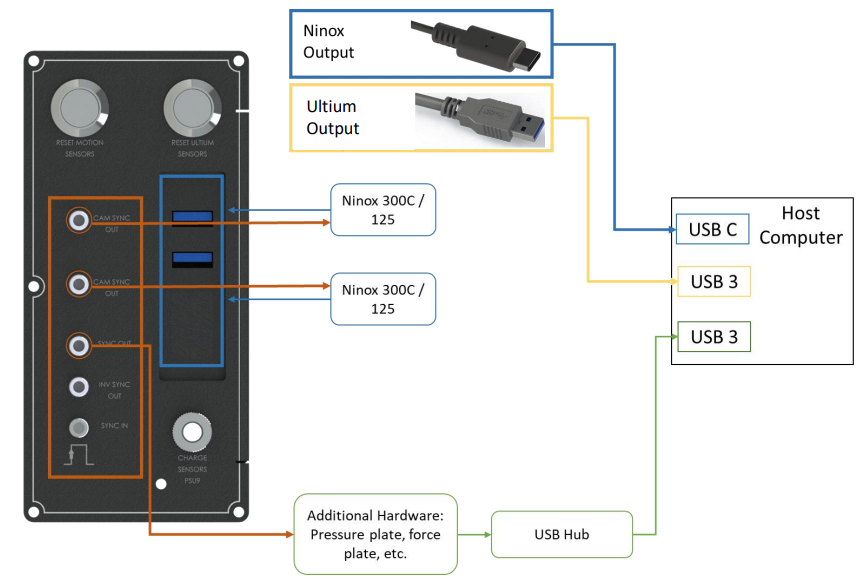
Ninox cameras are plugged into the Portable Lab via the Ninox Input.

Ninox cameras are connected to the computer via the Ninox Output (USB-C) cable.

Adding Force Plates
If your Ultium Portable Lab came with Force Plates, learn more about setting up your force plates with one of the following force plate setup guide, depending on the force plate model you use.
Synchronization
The MyoSync device that keeps all of your devices synchronized within the MR software is built into the Portable Lab. View our MR4 Synchronziation Guide🔗for more details on how to set up the sync hardware and software setting for your specific devices.

