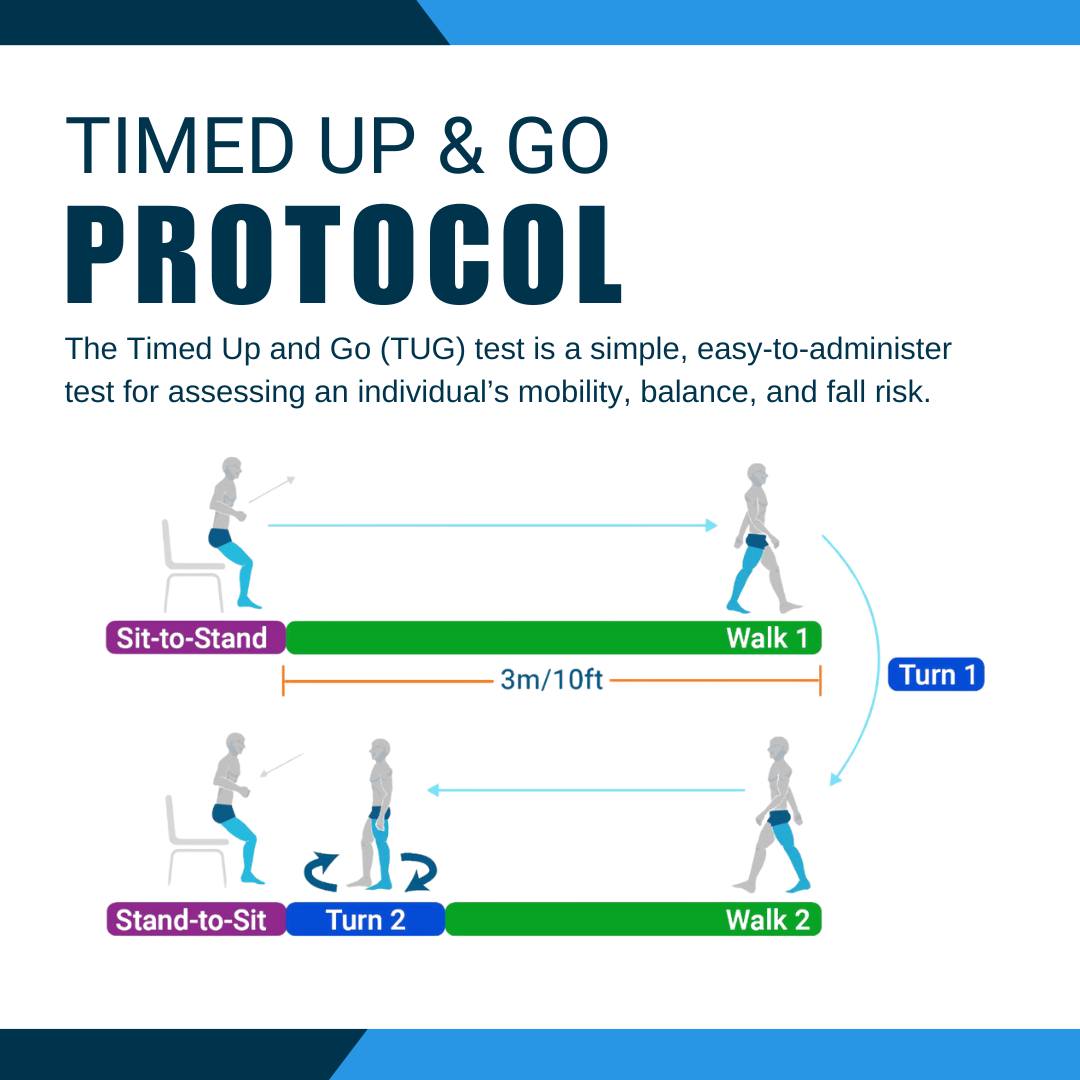
The Timed Up and Go (TUG) test is a simple, easy-to-administer test for assessing an individual’s mobility, balance, and fall risk. The test involves recording how much time it takes a person to rise from a seated position, walk 3 meters, turn, walk back to the chair, and sit down again. The TUG test has been shown to be a reliable and valid measure of mobility and fall risk in older adults and individuals with chronic conditions such as Parkinson’s disease, stroke, and multiple sclerosis.
Preparation
Required Noraxon Hardware:
- 3 IMU sensors (placed on the Left Foot, Right Foot, and Upper Spine)
- Camera (optional)
Required Additional Items:
- Chair
- Tape measure (to measure 3 meters)
General Information (derived from Podsiadlo and Richardson, 1991):
- The subject should sit in a standard chair with arms, placing his or her back against the chair and resting their arms on the chair’s arms.
- If an assistive device is needed for walking, it should be nearby.
- Regular footwear should be used.
- When the test starts, the subject should stand from the chair and walk to a line 3 meters (9.8 feet) away, turn around at the line, walk back to the chair, and sit down.
- The test ends when the subject is seated in the starting position and stable.
- The subject should be instructed to walk at a comfortable walking speed.
Setup
- Measure and mark a 3 meter (9.8 feet) walkway.
- Place a standard height chair at the beginning of the walkway.
Noraxon Setup
Step 1: Place 3 Ultium Motion sensors on the subject in these places:
- Upper Spine
- Left Foot
- Right Foot
Refer to the Ultium Motion Getting Started Guide for further details on setting up sensors in the Hardware Setup before proceeding.
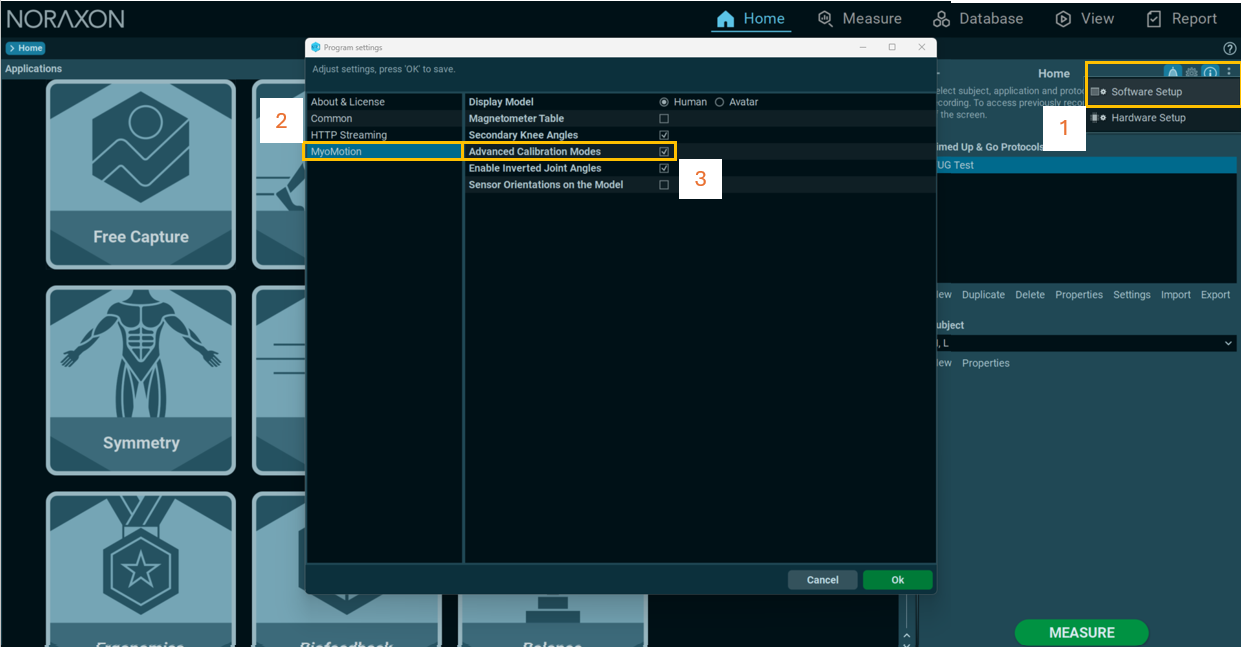
Step 2: If needed, enable Advanced Calibration Modes from the Software Setup.

Step 3: Create a New Subject or Select one from the list.
Step 4: Select the Timed Up & Go Application and the TUG Test Protocol.
Note: If desired, click Configuration when the Tug Test protocol is selected to confirm the configruation contains the Upper Spine, Left Foot, and Right Foot sensors.
Step 5: Click MEASURE from the HOME screen to start recording
Calibration
Step 1: Select the Multipose Calibration Mode, then click ACTIVATE
Step 2: Follow the calibration wizard to perform the multipose calibration.
Step 3: After completing the calibration, select Save & Measure Again, then ACTIVATE to apply the calibration to the next recording.
Recording the TUG Test
When the subject is ready, click RECORD.
TUG Instructions:
- The subject should sit in a standard chair with arms, placing his or her back against the chair and resting their arms on the chair’s arms.
- If an assistive device is needed for walking, it should be nearby.
- When the recording starts, the subject should stand from the chair and walk to a line 3 meters (9.8 feet) away, turn around at the line, walk back to the chair, and sit down.
- The test ends when the subject is seated in the starting position and stable.
- The subject should be instructed to walk at a comfortable walking speed.
Creating the TUG Report
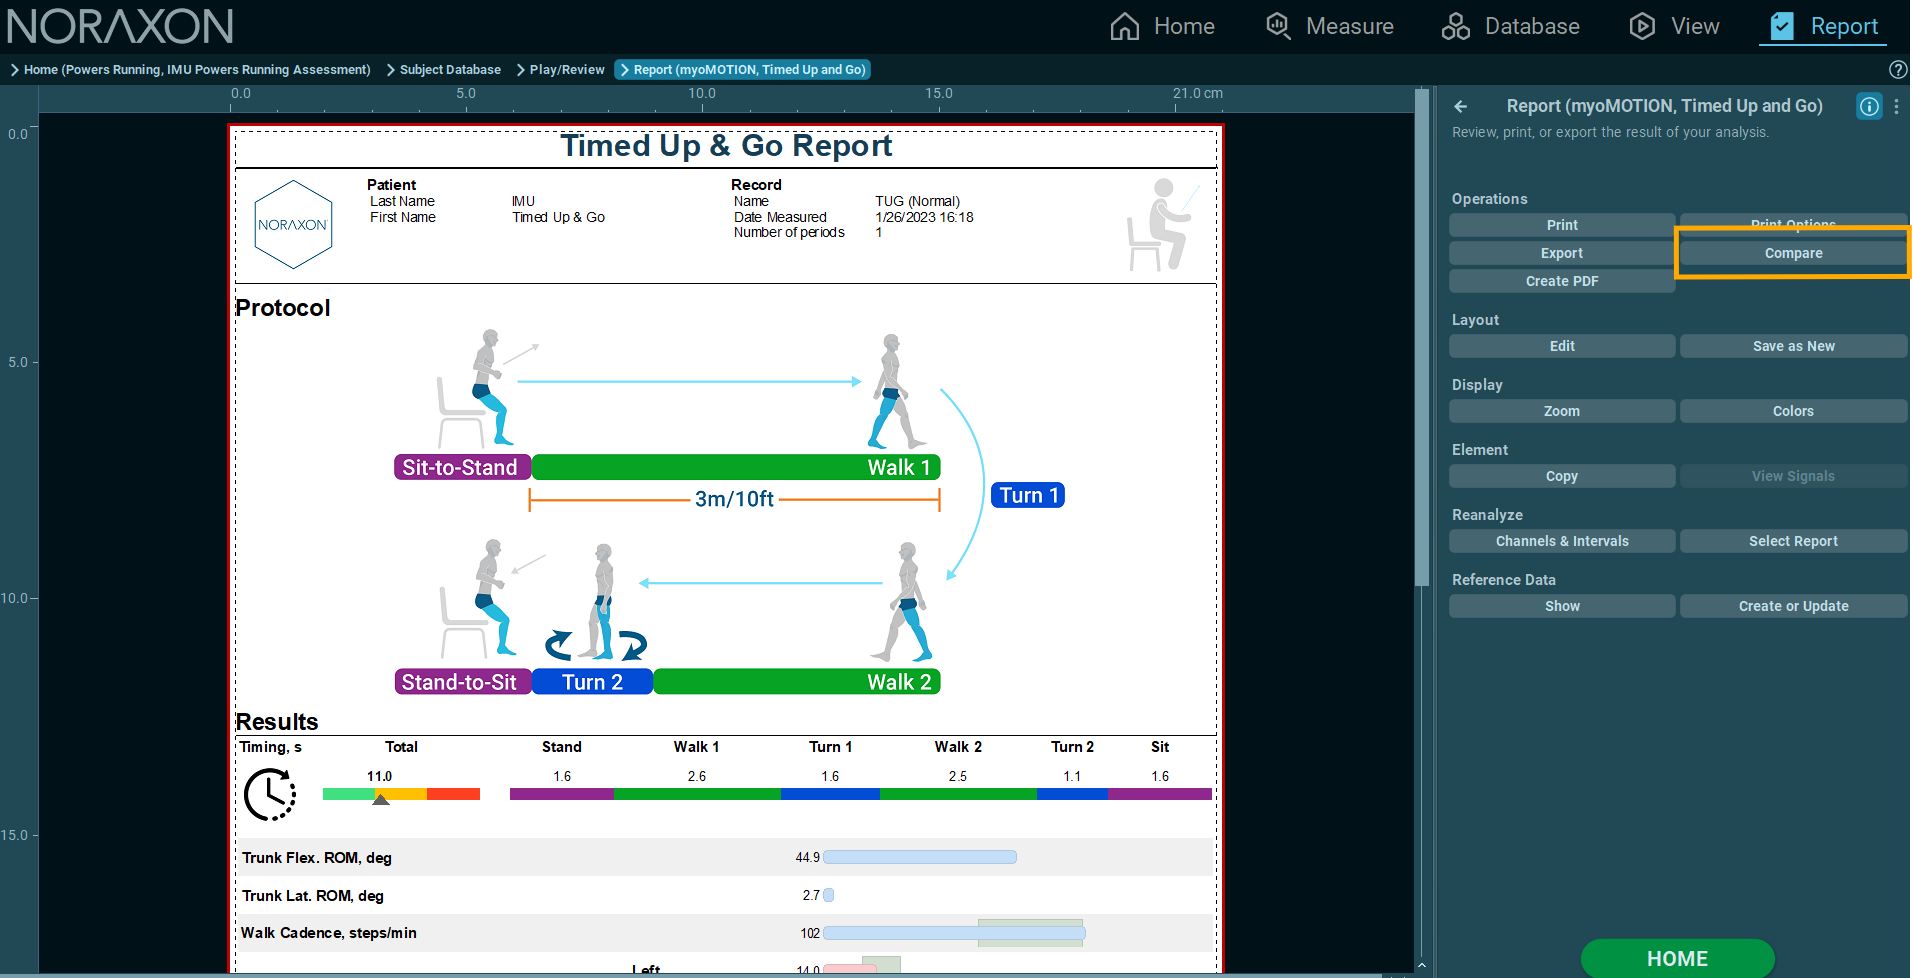
Click REPORT to generate a TUG report.
Additional Features
Compare reports to compare patient progress over time.


